How To Build A Rustic Farmhouse Dining Table
How To Build A Rustic Farmhouse Dining Table
Building this rustic dining table was one of my favourite projects. Using 100% reclaimed wooden planks I created a rustic industrial dining table. It took a while to prepare the wood and complete a perfectly smooth finish, but the end result is absolutely beautiful.

The wood came from a friend's discarded old decking. These particular pieces were the old support beams measuring 47mm x 150mm x 3.6m. Each piece had to be cut in half to fit in the van but this was a small sacrifice for all the free wood.
Any reclaimed wood can be used for a project like this. Many people use reclaimed scaffold boards as they are plentiful and easy to get hold of.
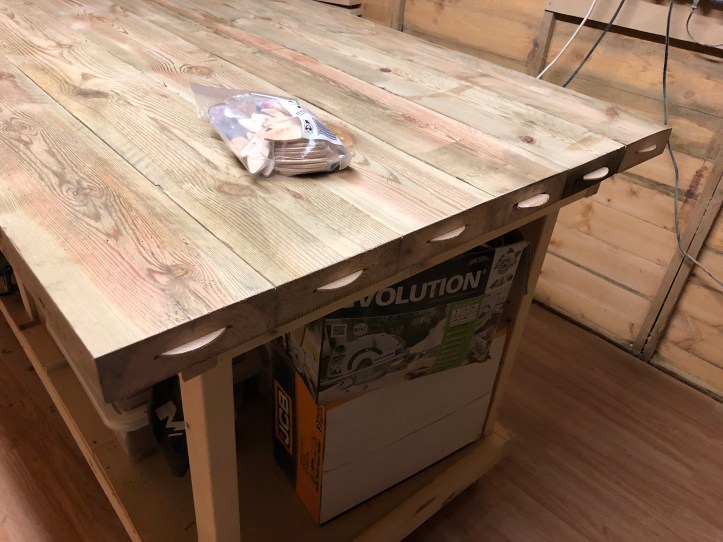
Check out my scaffold board rustic industrial dining table post here.
When the wood was originally offered to me I wasn't sure due to the condition. It was wet, worn and quite rotten in places but I decided to go ahead and see what I could make from it. I'm glad I did!
Reclaimed wood can be difficult to work with, but it's totally worth it to save a few trees and knowing you can turn something quite horrid into a beautiful piece of furniture.


Splinter city…

Before you get started, ensure the wood is completely dry and only select the best pieces for the project. Doing this will save you time and reduce any splitting in the wood once its in its new home.
Tool list
To complete this job you're going to need a few basic tools and a couple of specialist tools to make things easier. Here's my recommendations:
- Wrecking bar
- Electric plane and/or hand plane
- Claw hammer and rubber mallet
- Biscuit jointer
- Circular saw, plunge saw or sliding mitre saw
- Thicknesser (optional)
- Orbital sander and/or belt sander
- Sash clamps and ratchet straps
Here's my step by step guide
Step 1. Removing debris
I began by removing all the screws and nails. This was a tough job and I had to buy a bigger crowbar / wrecking bar to help with the rusted nails. Some of the nails snapped off inside the wood so I had to knock them in with a nail punch.
Step 2. cleaning the wood
The next job was to plane and sand each individual piece. I used my thicknesser to do the brunt of the work but you can use a handheld plane if you don't have access to a thicknesser.
There was a lot of dirt and grime on the wood which really gave the thicknesser a beating and I ended up having to replace the blades, but it saved me a lot of time.
Before

After

Once planed, I sanded each piece with a belt sander and then an orbital sander to leave a nice smooth finish. I went from a 60 grit paper to a finer 240 grit paper. This was important as the next step is to glue the bits together and the smoother the wood the better the contact between two pieces.

Step 3. Jointing
Fixing all the pieces together was up next. To ensure a good straight join along each piece I used a biscuit jointer. This machine cuts an even groove into the side of the wood in which you can place as small piece of wood (called a biscuit) to ensure two piece line up evenly against each other. Some say it also adds a bit of strength to the join but it's mostly for ensuring a perfect alignment.
Once all the bits had been cut with the biscuit jointer it was time for some gluing.


 Clamping some beams across the top and bottom here to ensure a completely flat finish whilst gluing.

Step 4, gluing.
I purchased some additional clamps for this part. I needed to reach across the width of the table which was about 90cm. 4 sash clamps were used to straddle the width and for the length of the table I used 2 ratchet straps.
To ensure the table top didn't bow when tightening the clamps I used some thick pieces of wood to brace across the top and bottom and securely clamped each one down at either end.
I did all of the gluing on a flat even surface to ensure the whole piece was perfectly flat. Any bowing in the wood or joins would have been very bad and made a wobbly table.
You'll need some decent wood glue for this part. The glue dries pretty quickly but I left it over night to be sure.
The next job was to cut each end and then glue the end pieces on in the same way as above. I used ratchet straps for this part.
Step 5. More sanding.
I then followed up with more sanding to get the table top as smooth as possible before I started to fill any gaps and imperfections.
Step 6. Filling gaps.
The table top was now ready for adding some epoxy resin to give the table a perfectly smooth finish. You don't have to use epoxy for this and a simple wood filler will also give a nice smooth finish to the table top.
Remember, the wood was in quite a bad way when I first started cutting it and had lots of holes and imperfections. The plan was to tape off the areas to fill with resin, mix and pour in one go as you only get a couple of hours before resin starts to set.
I started by using some basic electrical tape to cover all the joins and gaps on the underside of the table top. This would prevent any resin leaking through the bottom.
I then mixed the resin in a small cup and began to pour. This was tricky and I found myself returning too many areas as the resin leaked deep into the wood gaps. I used a blowtorch to bring any bubbles to the surface.
I let the resin set over night. It was important to ensure the temperature was about 18 degrees Celsius in the workshop to ensure the resin didn't cloud over.
For more great tips and guides for using epoxy resin on your projects take a look at fluid-painting.com. Whether you're building a new table, creating some jewellery or creating a piece of art, this is a great resource for all things epoxy.
Step 7. Final planing and sanding.
Once set, I began to manually plane the whole surface, followed again by loads of sanding. For the parts with resin I went all the way up to a 1200 grit paper to give the resin a super clear finish.


Step 8. The legs.
Finally, the legs. Where can you find the perfect steel legs for your projects?
You could ask a local metal worker to make you some but alternatively you can find the perfect legs on Etsy (handmade online marketplace)
Here are a few of my favourites:
Or you can simply search for metal dining table legs to find your perfect match.


Step 9. Wood protection. The whole dining table top was finished off with a few coats of Osmo Oil and lightly sanded after each layer.
 And there we have it. One sexy industrial style table. Super heavy duty. Love it! It looks even nicer in person, the picture doesn't do it justice.
Save money on your builds

Why not save some money when buying tools and materials using a cashback site like TopCashback. I've been using it now since 2018 and generated over £920 in cashback on my everyday spending. My wife has also been on for a similar time and has over £1200.
START SAVING WITH TOPCASHBACK

Thanks for reading
Thanks for reading, please do check out some of my other articles. You might like:
- Build your own garden shed
- Build your own veranda
- How to build a reclaimed wood scaffold boardwalk or decking area
- Summer garden makeover – Top money saving tips
- How to build your own under stair drawers for under £100
Here are a few more of my builds for some inspiration.


Thanks for reading and good luck with your projects.
Ben
How To Build A Rustic Farmhouse Dining Table
Source: https://wood-create.com/2019/03/05/building-a-rustic-industrial-dining-table/


Leave a Comment